Work Assignments
The Work Assignment Card is used with Resource Planning boards to assign Resources to specific Projects and Tasks, and to schedule these Resources in the Resource Planner, the Resource Board, or the Individual Resource Board.
Create a new Work Assignment Card
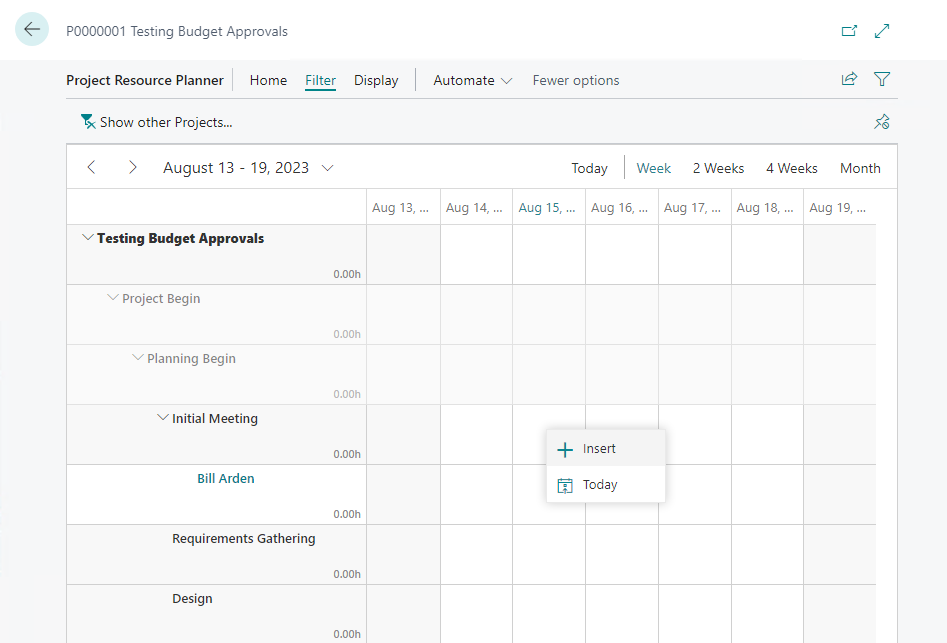
From the Role Center, select Actions > Resource Planning > and then select either the Resource Planner, the Resource Board, or the Individual Resource Board.
From the Resource Planner menu, select Process > Select Project, and select a Project from the Project List.
Right-click into a grid box for an active Task and Date and select Insert.
General FastTab
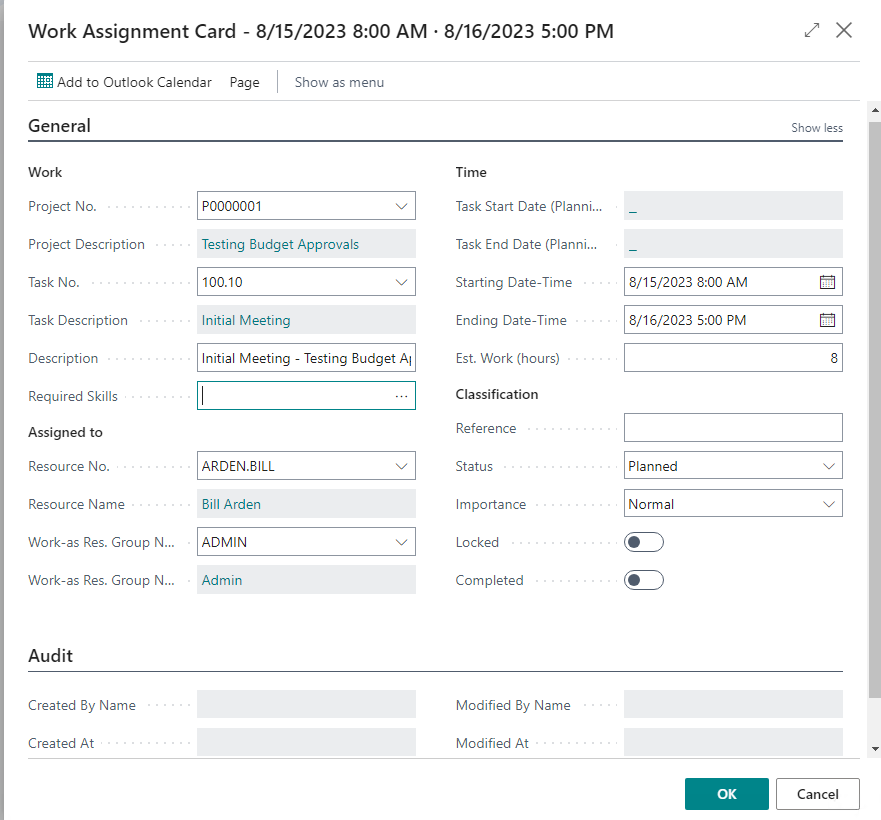
Work
| Field Name | Description |
|---|---|
| Project No. |
Specifies a unique identifier for the Project associated with the Work Assignment. |
| Project Description | Specifies a short description of the Project. |
| Task No. | Specifies a unique identifier for the Project Task associated with the Work Assignment. |
| Task Description | Specifies the Description of the related Project Task. |
| Description | Specifies a short description of the Work Assignment. |
|Required Skills| Specifies a list of Skills that the Resource must have to perform the work.|
Important
Required Skills is accessed via the Role Center > Resources > Actions > Setup > Skills. From the Resources List, use the Search feature to search for Skills or Resource Skills. Add a Skill Code and a Description of the Skill Code or use the lookup to select from a list of Skill Codes previously created. The Skill Code list is not available by using the Search feature directly from the Role Center.
Assigned to
| Field Name | Description |
|---|---|
| Resource No. |
Specifies a unique identifier of the assigned Resource. |
Tip
The value that is entered in the Required Skills field will filter the resources displayed in the Resource No. field to display only those Resources which have the required skill assigned to them.
| Resource Name |
Specifies the name of the assigned Resource. |
| Work-as Res. Group No. | Specifies a unique identifier of the assigned Resource Group. |
Time
| Field Name | Description |
|---|---|
| Task Start Date (Planning) |
Specifies the beginning date from the Planning FastTab on the Task Card. |
| Task End Date (Planning) | Specifies the ending date from the Planning FastTab on the Task Card |
| Starting Date-Time | Specifies the date and time when the assignment starts. Highlighted if set to start before the planned Start Date of the Task. This is found on the Planning FastTab of the Task Card. |
| Ending Date-Time | Specifies the date and time when the assignment ends. Highlighted if set to end after the planned End Date of the Task.This is found on the Planning FastTab of the Task Card. |
| Est. Work (hours) | Specifies the estimated total number of hours of work for the whole Work Assignment. |
Tip
The Work Assignments work with absolute time, so a user in EST importing the budget entry creates a Work Assignment starting at 8:00am EST, if someone in PST looks at it, it will start at 5:00am (PST).
Classification
| Field Name | Description |
|---|---|
| Reference |
Specifies identifying information for the Work Assignment. |
| Status | Specifies the current status of the Work Assignment. Options: |
| - Tentative | |
| -Planned | |
| - Confirmed | |
| - Completed | |
| Importance | Specifies the importance of the Work Assignment. Options: |
| - Normal | |
| - Low | |
| - High | |
| Locked | Specifies, if true, that Work Assignment is locked. This blocks most changes. |
| Completed | Specifies, if true, that the Work Assignment is completed. This blocks most changes. |
Audit
| Field Name | Description |
|---|---|
| Created By Name |
Specifies the user who created the Work Assignment |
| Created At | Specifies the date and time when the Work Assignment was created. |
| Modified By Name | Specifies the user who made the last change to the Work Assignment. |
| Modified At | Specifies the date and time of the last change to the Work Assignment. |
Add to Outlook Calendar
Click Add to Outlook Calendar to send the selected item as an appointment on the assigned Resource's Outlook Calendar.
Important
The Resource must have an email address specified on their Resource Card > Personal Data > E-mail field. In addition, the Resource must be setup in Exchange Accounts. For more information on setting up an integration with Outlook, see: Outlook add-in for Progressus.
To assign Work to Resource (drag-and-drop)
- Open a Resource Board
- Hover the mouse over a Work Assignment
- Drag-and-drop the Work Assignment to the row of the Resource in question.
Project Team
Resources that are connected with a Project can be defined as a Project Team where each Project Team Member has a specific Role.
Project Team Roles can be set up with a Work Permission Set. For more information, see: Work Permission Set
To create a Project Team role
- Choose the Search icon, enter Project Team Roles, and then choose the related link.
- Select the New action, fill out information on the Project Team Role and close the list.
| Field Name | Description |
|---|---|
| Code |
Specifies a unique user-entered identifier for the Role . |
| Description | Specifies user-entered text that provides information about the Role . |
| Work Permission Set | Specifies a Work Permission Set given to members with this Role , in addition to other Work Permission Sets. For more information on Work Permission Sets, see: Work Permission Set |
To add a Project Team member
- Choose the Search icon, enter Project List, and then choose the related link.
- Select a Project and select the Project Card action under the Project action group.
- Select Project > Project Team Members and select New.
- Fill out information on the Project Team Member and close the list.
| Field Name | Description |
|---|---|
| Resource No. |
Specifies the Number of the Project Team Member Resource. |
| Resource Name | Specifies the Name of the Project Team Member Resource. |
| Role | Specifies the Role of the Project Team Member Resource in the Project. |
| Role Description | Specifies the Description of the Role of the Project Team Member Resource in the Project. |
See also: